What are the best survival tools?
part 3
In part 1 … of “The Best Survival Tools”, I introduced the
- The tools for Building a Shelter,
- The tools for Building a Fire, and
- The tools necessary for providing Safe Drinking Water.
In part 2 … of “The Best Survival Tools”, I introduced 3 more tools and skill systems that make up of my 10 Essentials. These tools are:
- The Cutting Tools.
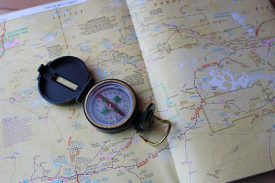
- The tools to aid in Navigation, and
- The tools of First Aid.
Thanks for following me through part 1 and part 2, and here we are at part 3. The third segment of this series describing my 10 essential tools for survival in the Coastal Rain Forest of the northern part of the North Temperate Zone.
The north temperate zone extends from 23.5° north latitude to the Arctic Circle, at 66.5° north latitude. The prime area of activity for my wilderness adventures is from 49° north latitude to 60° north latitude.
The Best Survival Tools, part 3
In part 3, I am adding,
- Clothing,
- Illumination,
- Signaling, and
- Miscellaneous tools and things
I will elaborate on these 4 categories and show you why I consider them part of my 10 essentials tools and systems for wilderness survival.
Clothing
Unless you live and work above the Arctic Circle in winter conditions, and spend most of your day to day activities hunting and trapping, today’s outdoor clothing is very much a layered system of highly evolved fabrics.
Staying warm and comfortable, while participating in outdoor activities involves a system of layering your clothing. Layering protects you from the various elements and serves to regulate your body temperature.
There are three parts to this layering system. The base layer, the middle layer, and the outer layer.
The Base Layer
The base layer of this clothing system is in direct contact with the skin and serves to “wick” or transport moisture away from your skin and to the surface of this base layer where it can evaporate.
The thickness of this base layer is determined by temperature and level of activity. Seamless and flat-seamed clothing is less likely to rub against your other layers and the equipment you carry on your body. This layer should fit snugly and not restrict your body movements.
The base layers are made from natural and synthetic materials. Natural materials include cotton and wool. Cotton is a poor base material because it retains moisture and will leave you cold.
Wool, on the other hand, can absorb up to 35% of its weight in moisture. It is warmer than synthetics and naturally odor-resistant, but it takes longer to dry and is more expensive.
Synthetic base materials, on the other hand, absorb very little water and are quick to dry. They stretch well and are easy to care for, but they will retain body odors when worn for extended periods of time. Many synthetic materials now have antimicrobial treatments that help to cut down on odors.
The Middle Layer
The middle layer is the insulating layer and it traps your body heat to keep you warm. This layer should be very air permeable so that the warm, moist air can easily pass through it.
This layer includes the many types of fleeces that insulate your body without being bulky. This layer should also be fairly snug, yet roomy enough to not restrict movement with the base layer.
These middle layers are also made of natural and synthetic materials. Polyester fleece is a good middle layer because it traps warm air and absorbs very little moisture. Polyester is heavier and bulkier than down, but it dries more quickly and will retain most of its insulating characteristics when wet.
Another classic middle layer material is down. Down provides excellent warmth for its weight, however it loses most of its insulation value when wet and it is also slow to dry. When kept dry, however, down has very little competition.
The Outer Layer
The outer layer or “shell” is what protects you from the elements. This is the layer that protects you from the wind and the wet stuff. This layer should be breathable and it has to let moisture escape from the inner layers. It should be loose enough so that you can move freely, but not so loose that it permits your body heat to escape.
Outer layers are designed to protect you from the wind, the rain or the cold. They are classified as “hard-shells” and “soft-shells”. “Hard-shells” are made up of a 2 or 3 layer construction and are better at shedding water. “Soft-shells” are single layered, lighter and sometimes sufficient for less extreme conditions.
Insulating layers are designed for the extreme cold when you are not moving around quickly and often. They are very useful in extreme cold and when you are less active.
Additional Considerations
The clothing system that you wear today is a very evolved piece of technology. The environment and your level of activity, are important factors to consider when dressing for outdoor success. Keeping your body warm and comfortable is a science that has evolved immensely over the years.
If you are beginning a new activity, do some research about the “climate” you will be dealing with. If you are already involved and feel “comfortable”, you are probably well dressed.
Old sayings like, ” if your feet are cold, put on a hat”, are based in common sense and real science.
A very high percentage of heat escapes from your head.
Socks and boots, and gloves and mittens complete this important part of your wilderness survival kit.
Illumination
Illumination is another area of outdoor technology that has grown by leaps and bounds. Gone are the days of candles and heavy flashlights that weighed pounds and kilograms.
Light Emitting Diodes (LED’s) are the new technology.
LED flashlights and headlamps shine more brightly and with greater intensity. The best setups have a single, super-bright LED – or – a cluster of lights.
These lights have long burn times and give-off intense, bright light. LED’s can last from 50,000 to 100,000 hours. They are shock resistant, compact and lightweight, with a temperature range from -40 to +80° C.
Batteries will now last from dozens to hundreds of hours. Some 3-light clusters can provide 10 meters of illumination and 4 AA batteries will last 180 hours.
There are many options available within your price range, and once you are introduced to these LED’s, you will never go back to old-school technology.
When you are not using your flashlights and headlamps for extended periods, the batteries should be removed, to prevent the lights from being accidentally turned on.
There are many excellent examples of LED Headlamps and Flashlights, all reasonably priced and providing excellent value for the money. They will provide you hundreds of hours of intense, bright light!
Signaling
Signaling refers to attracting attention when you are lost or in need of rescue.
Sound and Visuals are the 2 methods of attracting attention.
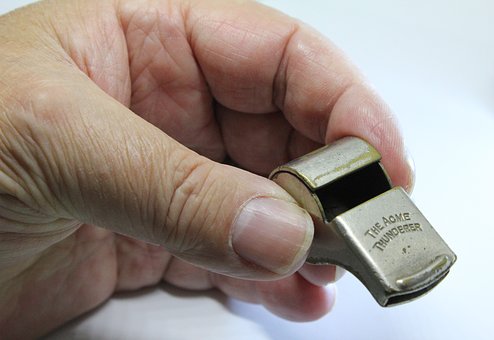
Whistles and Guns produce sounds that will be heard for many miles.
Modern-day whistles can emit shrieking sounds of 100+ decibels. There are many shapes, sizes, and colors. Look for the 100-decibel range and be considerate when experimenting with these whistles around people and animals.
THREE (3) Blasts from your whistle or THREE (3) Shots fired from your gun are a universally recognized Signal of Distress.
Visual Signals can be produced with: 1) a large, Orange-Colored “garbage bag”, 2) a purpose-specific Signal mirror, 3) the Mirror on your Compass or 4) the SMOKE FROM YOUR FIRE!
Have “green boughs from spruce or fir trees close to your fire”, if you are in distress so that you can Signal aircraft or “ground-based” rescuers if the opportunity presents itself. Simply throw these “green” boughs on your fire. The clouds of smoke that they produce will be seen for miles!
Miscellaneous Tools and Things
This is a category that I leave open to myself and to you as well.
This is the place to throw in whatever little gadget you have a special attachment to and that adds value to your survival kit.
- duct tape
- multi-tools
- sewing kits
- fishing kits
- and other useful items
… you get the idea.
The main concern here is weight and usefulness.
Do not bring the kitchen sink!
Final Thoughts
The very purpose of this kit is that it is useful and convenient. It has to be lightweight so that you bring it with you!
If you get lost or are unable to make it back to your vehicle, these items, when used properly, will greatly increase your chances of survival.
They can save your life!
This 3-part series of the “Best Survival Tools” is very complete and well conceived. It is based on experience in the field and years of research and experimentation.
In this 3-part series, I have described the following skills and systems necessary for wilderness survival.
- Shelter
- Fire
- Water
- Cutting Tools
- Navigation
- First aid
- Clothing
- Illumination, and
- Signaling
Your ability to survive the wilderness in comfort and safety will be closely tied to your knowledge and application of these skills.
Do not be intimidated by this huge skill-set .
You cannot learn them overnight, and you may not always need all of them!
Educate yourself at your own pace, read as much as you can about them and practice these skills until they become second nature . Practice them at home and in the wild, when you are not in an emergency situation and the weather is pleasant.
Learn to relax your mind !
This will relax your body , and you will gain more benefit from your experiences in the wilderness.
After all is said and done, you will be hard-pressed to find a more impressive and awe-inspiring classroom than Mother Nature.
Comments, Questions, and Suggestions
If you have any comments, questions, or suggestions about my “survival kit”, do not hesitate to Contact Me.
Keep in touch!
The next part of this series will be about food and how to nourish yourself, if you lost for an extended period of time.